
 Image 1 of 4
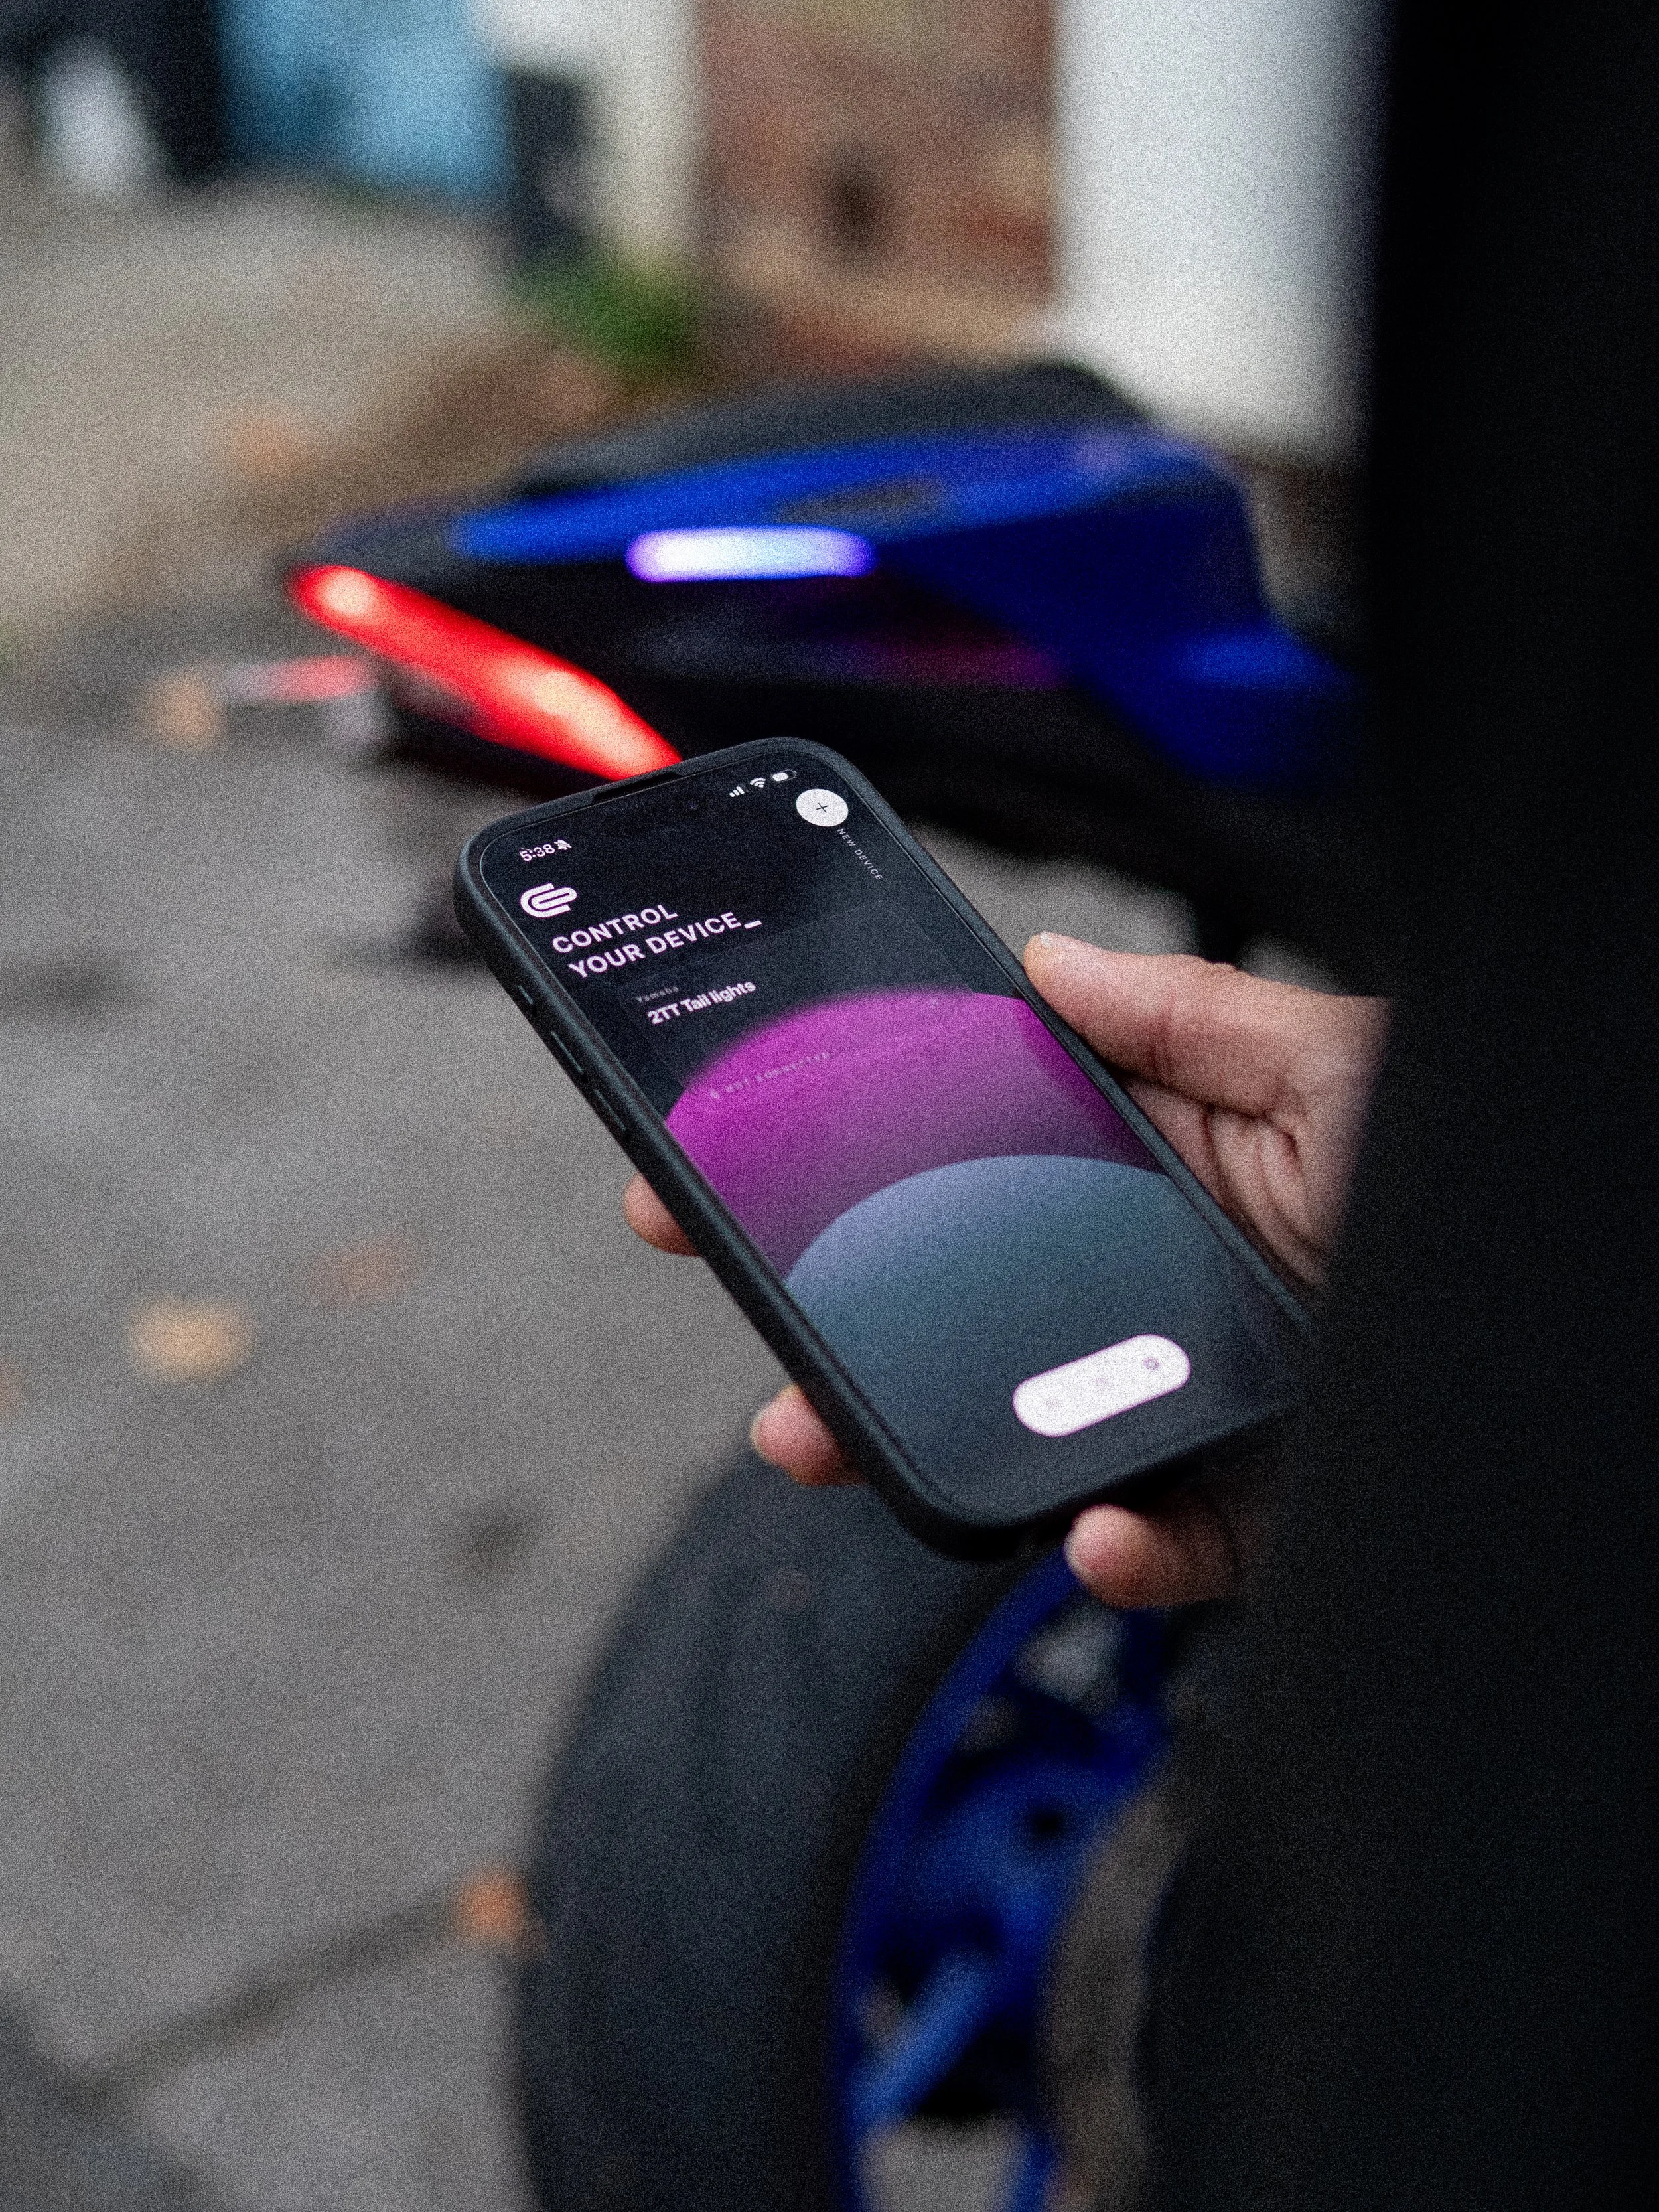 Image 2 of 4
 Image 3 of 4
 Image 4 of 4
FIRST BATCH EXCLUSIVES
FIRST BATCH EXCLUSIVES
Early bird pricing, Prices will increase when first batch is sold out
Custom name on the lights, visible in the app
Extended Warranty ( 1 year ), Free replacements if anything goes wrong
Personal communication with us
Video chat for when you install the lights (if needed!)
Access to our private discord server where you can see the development of the lights and get access to upcoming products early
Free Resistor pack included (incase of indicator hyperflash)
MORE INFO
-
We will be releasing a video tutorial soon, but for now:
Having the system as plug and play makes install extremely easy, the most time consuming part is taking off all the panels fairings.
To start install you need to the ECU. You can get away with leaving the left black piece on if you finess it a bit…
Place the Control box underneath your pillion seat, there’s plenty of room for this to sit. You can either mount it with the included mounting or have it free in the space
Connect the Indicator connectors and plate light connector ( this is what powers the system). The right indicator will have a white connector and this plugs into the connector with white markings. Black is left and goes into the black connector.
Clean the surface of the fairings where the lights go with the included alcohol wipe and let this dry.
Peel off the 3m tape and line up the lights using the bracket that holds them against the top mounting points. (Heat the 3M tape for a better stick)
Stick them down and hold them in place for a bit. Applying pressure.
Next, install the fairings back onto the bike. the wire routes through the mounting bracket to the control box under the pillion seat. Make sure this isn’t being trapped when bolting down
Tighten up all your bolts, let the 3M tape sit for a couple hours ( if you can wait that long)
Download our app from the App store or Play Store.
Enjoy!
-
You’ll be able to download the app at any time from the App Store or Google Play Store
Once you’re lights are powered on using your ignition, you’ll be able to add them into your app using the “add device button”
You will now be bound to your lights and only your phone can control them. You’ll see the lights on your home page and will be highlighted in blue when they’re ready to be controlled
After that, it’s all you! Change to any animation/colour you want!
These are to be used at your own risk and are not intended for road use.
WHATS IN THE BOX
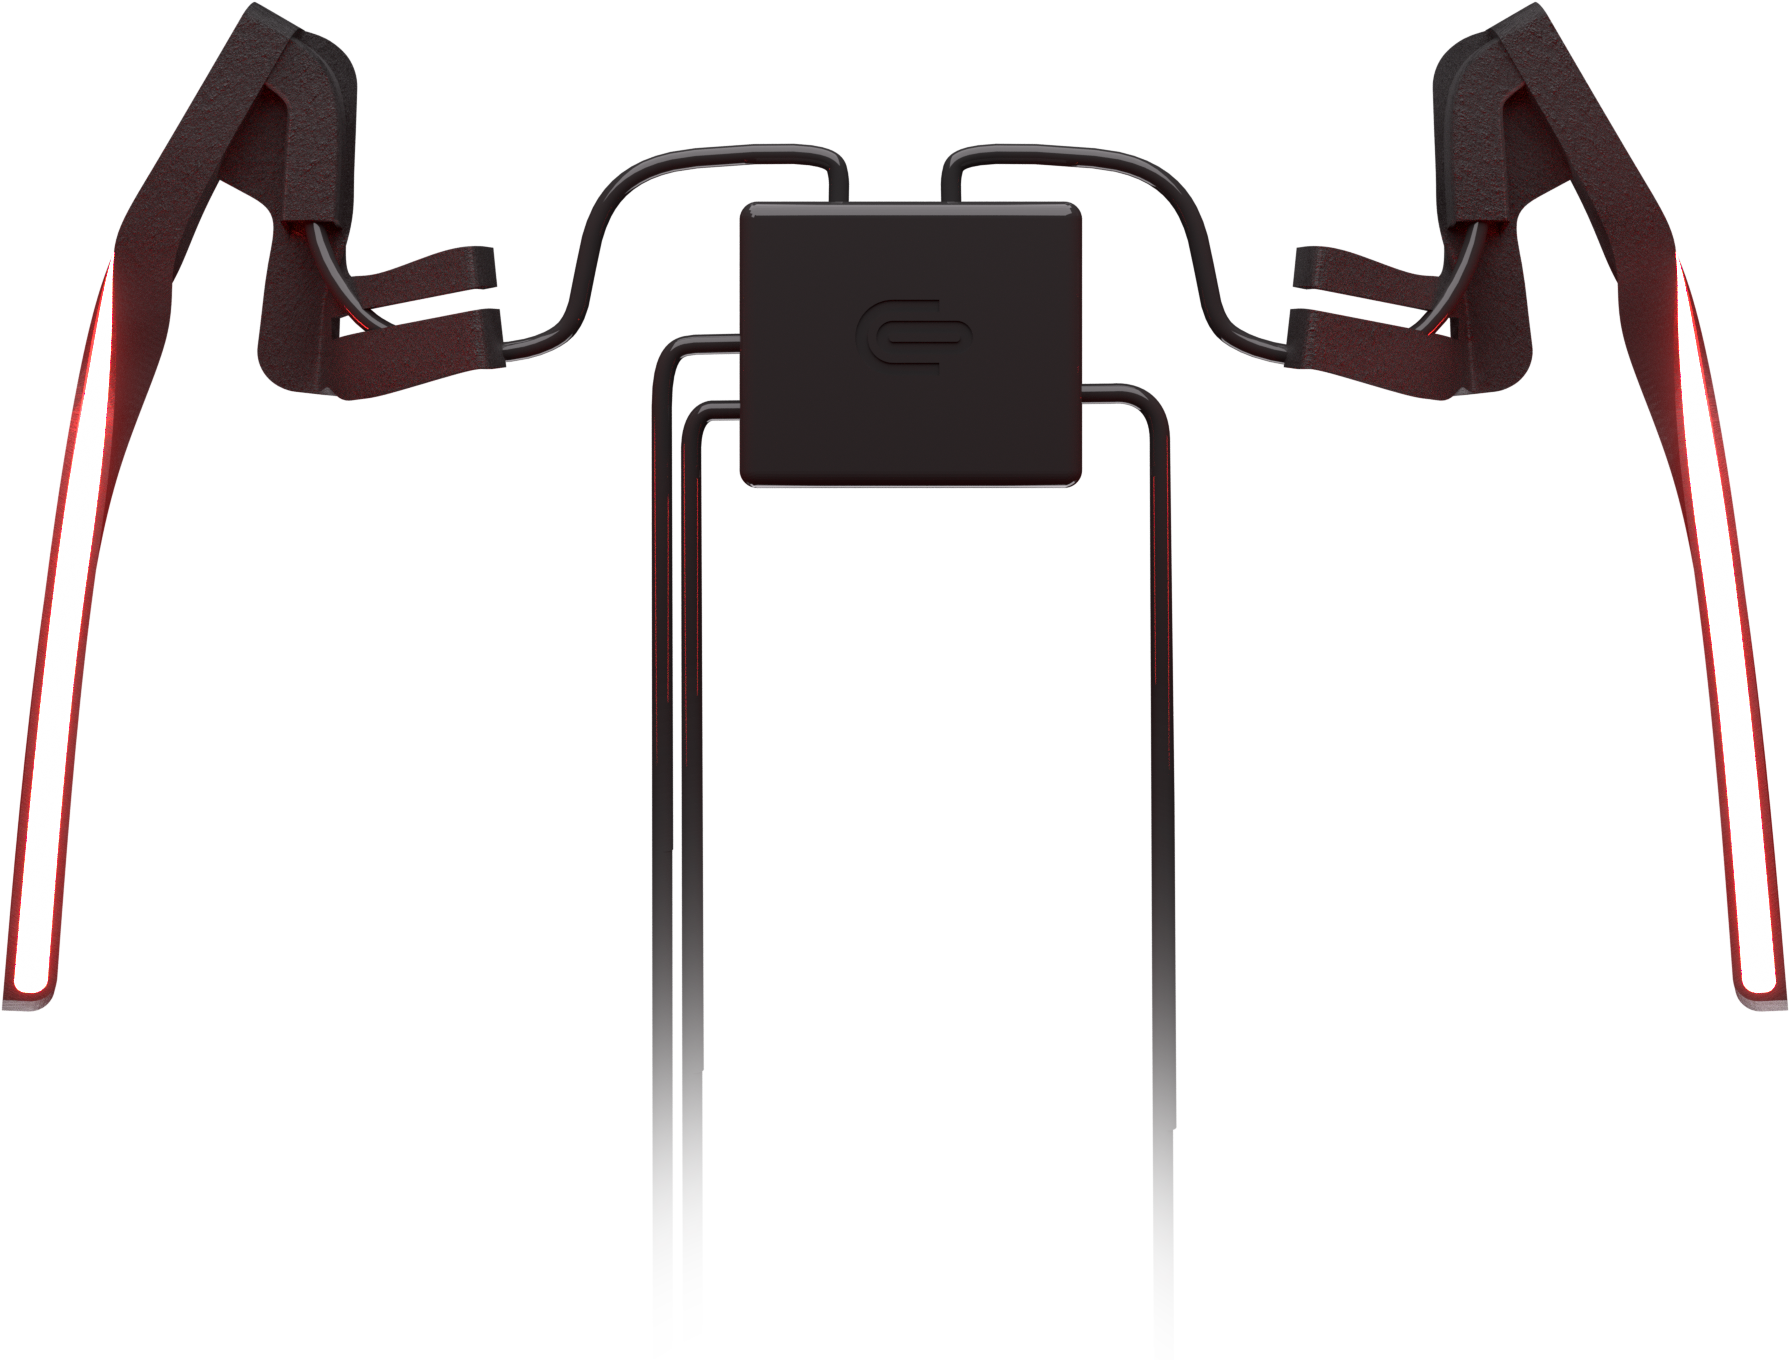
Left Light - Control Box - Right Light
Key Ring - Instructions